Advantage Tactical Sights
By James Nicholas

Advantage tactical Sights
Manufacturers E-mail: info@advantagetactical.com
Manufacturers Website: www.advantagetactical.com
Manufacturers Phone: (310) 316-6413
MSRP: $98.49
Materials: Steel, Colored Plastic Inserts
Models Available For:
- ATS00950 - Bolt Action Rifles
- ATS00125 - Glock Pistols
- ATS00625 - Kimber 1911
- ATS00226 - Sig Sauer (except 250 & 1911)
- ATS00900 - Sig Sauer 238
- ATS00250 - Smith & Wesson M&P, SD & Shield
- ATS00251 - Smith & Wesson M&P22
- ATS00225 - Springfield XD, XDM & XDS
- ATS00725 - Taurus 24/7 Generation 2
- ATS00700 - Taurus 709, 740
- ATS00450 - Universal Shotgun
- ATS00925 - Universal Bull Barrel
Advantage Tactical Sights manufactures probably one of the most customizable sights on the market today. Also a first as far as I know this is the only “Fixed” sight system that allows you to change both elevation as well as windage. With adjustable sights the concern is that they are not good for harsh environments since they must move to be adjusted. If the adjustable sight gets knocked around, it will move and not hold. With fixed sights you usually pick your sight height for your elevation and push the sights into a dovetail where the tightness will hold them in place. Fixed sights are great because they never move and limited because they don't move. Every person will look at and use his sights differently. It’s because of this that one sight that works and is dialed in for one shooter may not work for the next. Advantage Tactical fixes this by providing shims to adjust the height of the front sight for elevation. Since the rear sight uses a large screw to help with hold it in place, simply loosening it will allow relatively easy windage adjustments. Each of Advantage`s sight kits come with 5 different color front sight inserts as well as 5 different color rear sight inserts. Just by changing these inserts you have 25 different color combinations that you can use to set up your firearm to get the best performance available.


The Advantage tactical sights come shipped in a plastic clam shell. To see what model of sights you are looking at flip it over and look at the back of the packaging above the bar code.
These are all the extras you get with each sub 100 dollar Advantage sight kit. I was actually amazed they were able to fit all of this stuff in such a small package. All of extras allow you to customize your sighting system with over 25 different color sight combinations. The kit includes the following items: The front and rear sights (yellow rear and red front inserts already installed). 4 extra high visibility rear inserts orange, green, white & red. 4 high visibility front sight inserts, orange, yellow, white & green. 6 metal shims an installation sheet and an Advantage Tactical Business card.


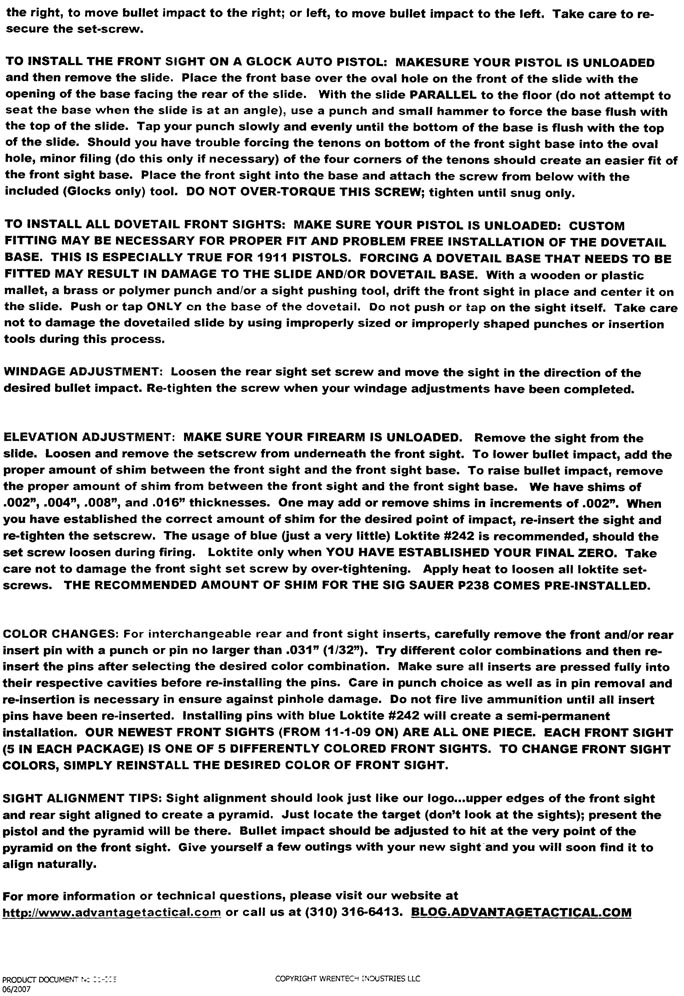
The cardboard insert/business card (far left). This is the front and back of the installation instructions, and I would highly recommend you fully read this document before installing your sights. Just click the documents for a larger size you can actually read.
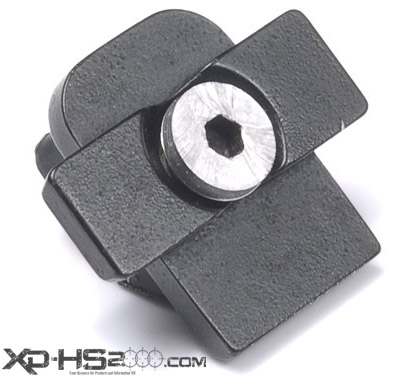
A 360 view of the Advantage Tactical front sight. This is how it comes assembled from the factory with the high visibility orange insert and no shims installed.
Each kit comes with five different color front sights inserts. From left to right: Green, White, Orange, Yellow and Red. The front sight inserts are made out of a polymer material and are held in the metal sight base with a screw. The screw attaches in the bottom of the insert.
The Rear sight housing with the yellow insert installed as it comes from the package.
The rear sight housing with the five colored rear inserts. From left to right: Red, White, Orange, Yellow and Green.
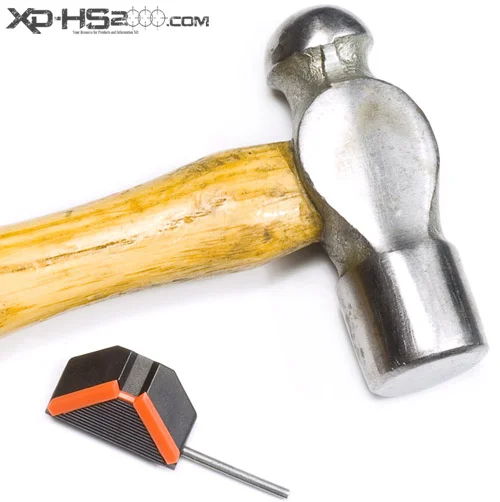
Advantage includes some good instructions, but they do not list all of the tools required. So here are all the tools that you need to install or adjust the sights. Take the list and gather everything ahead of time to make your life easier. Tools required and pictures include: 3/32 hex key, 1/16th hex key, 3/16 punch, 1/16th punch, small hammer, blue locktite.


To adjust or change the color of the front sight you will need to access the 1/16th hex head machine screw on the bottom of the sight (far left). Use a 1/16th hex key and remove the Screw (both center pictures). Once the screw is removed you can easily pop the color insert out of the front sight base housing(far right).


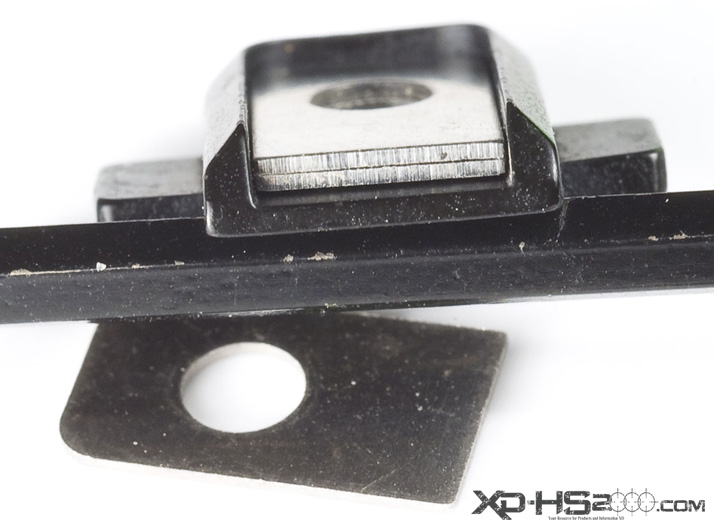


Now that your front sight is disassembled, you can add or remove shims. The basic rule for elevation adjustment with Advantage sights is adding shims will lower your impact. Removing shims will raise your impact. The six included shims are shown far left and come in various thickness. You add these shims to the sight housing. The rounded portion of the shims should match the direction of the front round portion of the sight housing. Once the shims are added you can install your colored insert. Here we chose a green front. Now take your 1/16 hex key and tighten the screw enough that it is flush with the wings of the sight housing. Note: Far right red arrow points out the shims under the colored insert.


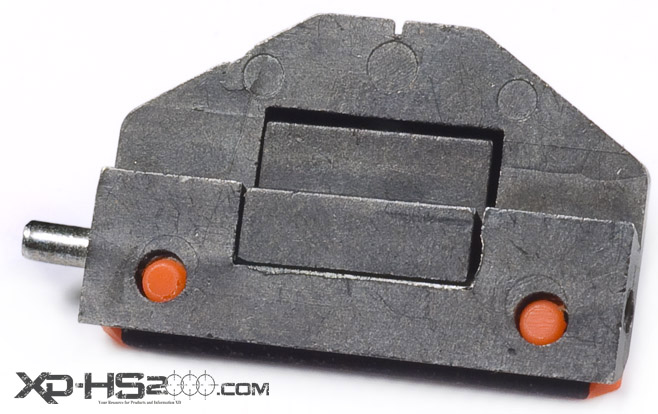
The rear sight hosing is actually two pieces and is used to tighten the rear sight in the dovetail Make sure this screw is loose(far left). To change the colored insert use a 1/16 punch and tap out the roll pin (shown 2nd picture to left highlighted by red arrow). Once the roll pin is removed, remove the tightening screw using a 3/32 hex key. With access to the bottom I used my punch and and pushed the yellow insert out of the sight housing (last two pictures to right).


I replaced the yellow rear insert with the orange insert. Insert the tabs of the insert into the holes in the rear sight housing and push it down into place (first two photos left). With the insert locked into place, replace the movable tightening block back into the bottom of the rear sight. Now start your roll pin back into the side of the rear sight.


Use your hammer and tap the roll pin until it is at least flush with the side of the sight. Now you can use your 3/32 hex key to install your set screw, keep it loose and only tighten it after you have installed it in the dovetail.